With the cost effectiveness of cloud computing and the ease it provides for commissioning and decommissioning the cloud services, it has become a lot easier to work on cloud. Be it hosting an application as a web application or creating a VM for specific needs, cloud has become a backbone of software development industry.
But with this ease comes the negligence around how many services we create and how much cost we pay for them. Once such problem is the Virtual Machines.
We often create virtual machines for our R&D and development exercises. These VMs become our servers where we host the application and use them over the internet. The cost we pay for these VMs start increasing and it adds to the total R&D cost.
Azure VM pricing is based on the number of hours the server is up and commissioned. In a month of 30 days (720 hours), someone could be easily paying around USD 300 (for a Standard A3 VM). Now consider how many hours during the day you actually need to use this VM. If we work for 10 hours per day, we could be needing this server only for those 10 hours. Remaining 14 hours are potential cost that we pay without using the resources. Add to this the weekends and holidays we don’t work. A simple calculation for the amount of dollars we can save per month:
Proposed Saving
| VM Type | A3 Windows 2012 R2 |
| Pricing / hr | USD 0.360 |
| Number of hours (Compute Hours) / month | 720 |
| Possible Saving of computing resources | 14 hours every weekday day = 280
24 hours X 8 Weekend days = 192 472 hours per month |
| Monthly Cost without Shutdown | USD 259.2 |
| Monthly Cost with Shutdown | USD 89.28 |
| Saving | USD 169.92 (Worth next two months cost of the same VM) |
Disclaimer: The cost saving depends on what time duration you can switch off the servers. If the server is a Live server, you might not want to switch it off.
Now, how do we save this cost and how do we setup auto shut down of the VM.
Below are the steps:
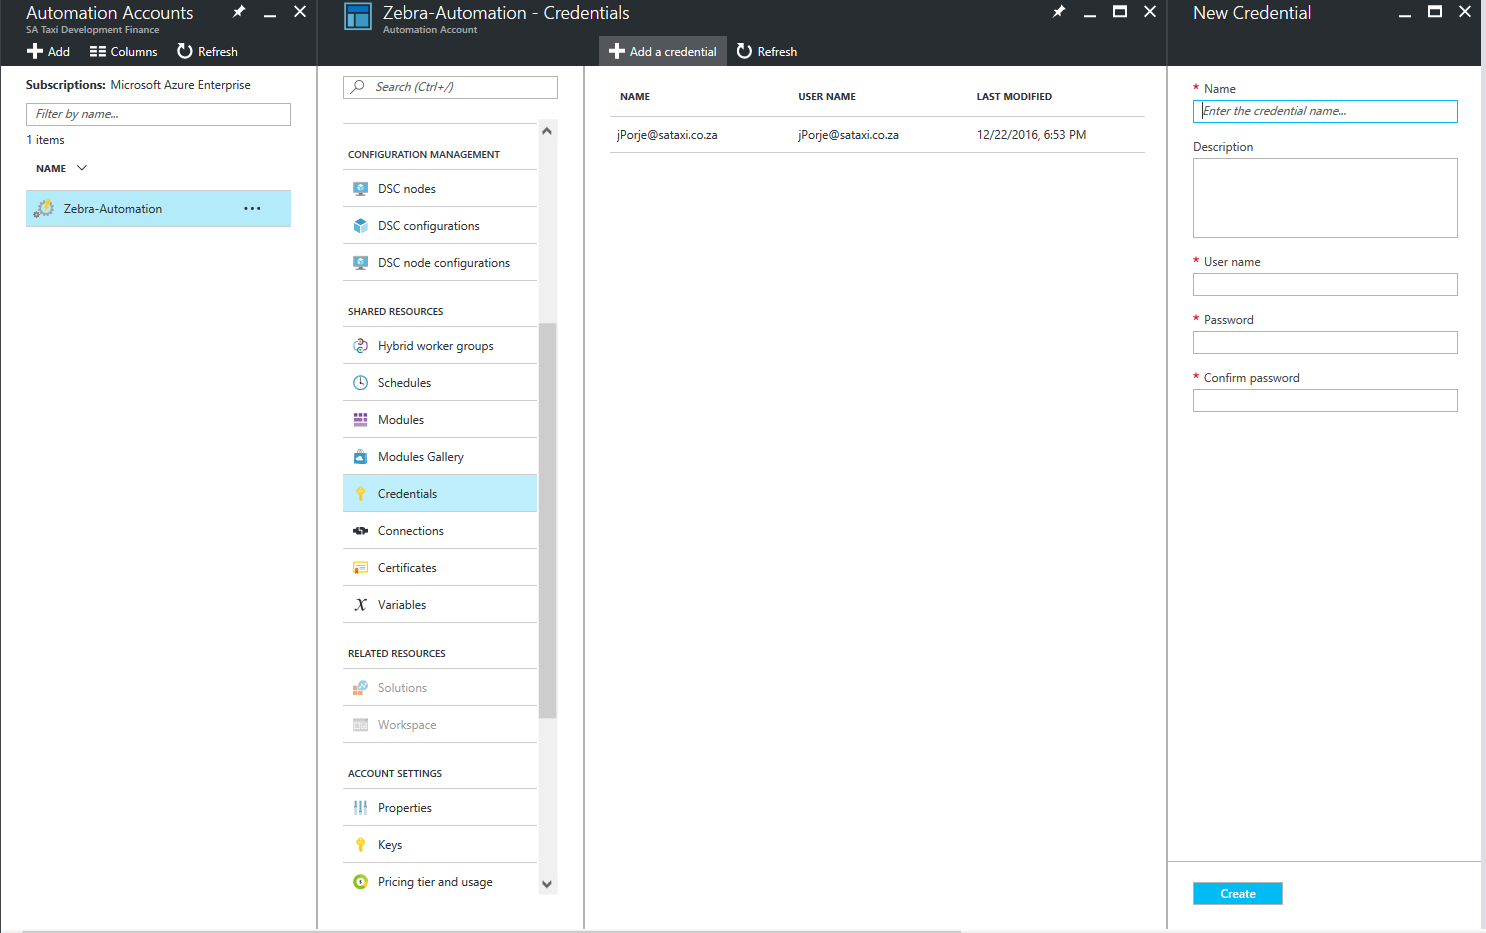
1.1 Create an Azure Automation Account
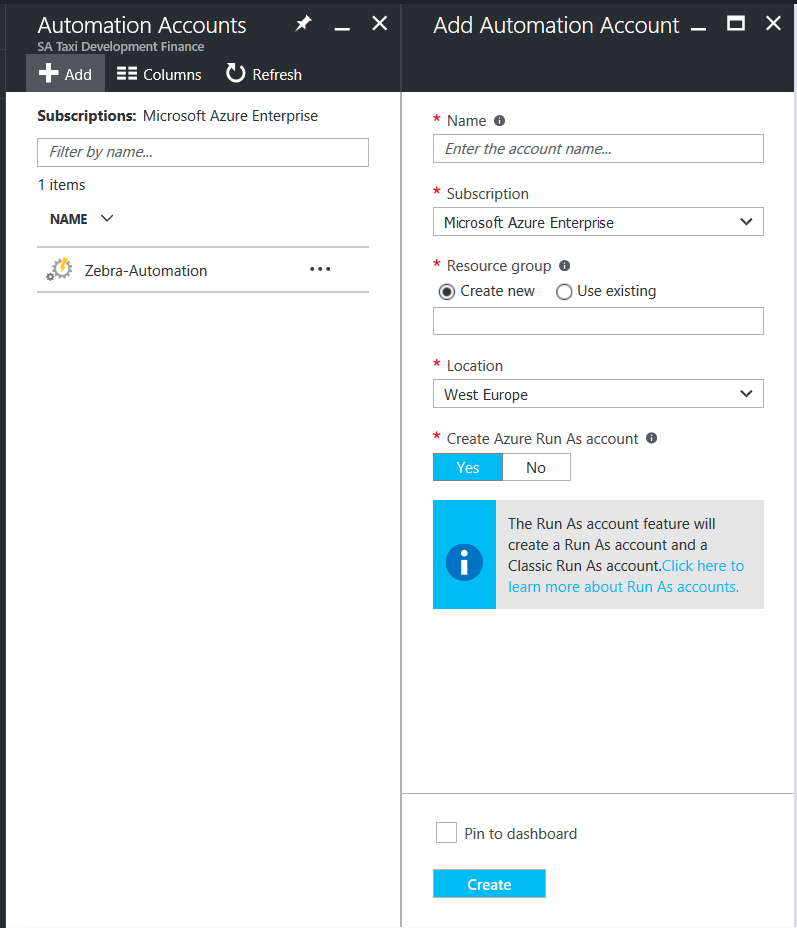
1.2 Associate a user credential to this Automation Account.
Remember that the user credential which is to be associated should be of a Co-Admin user for that subscription. This is required for the Runbooks to get access to the VM and Azure Power Shell on the VM.
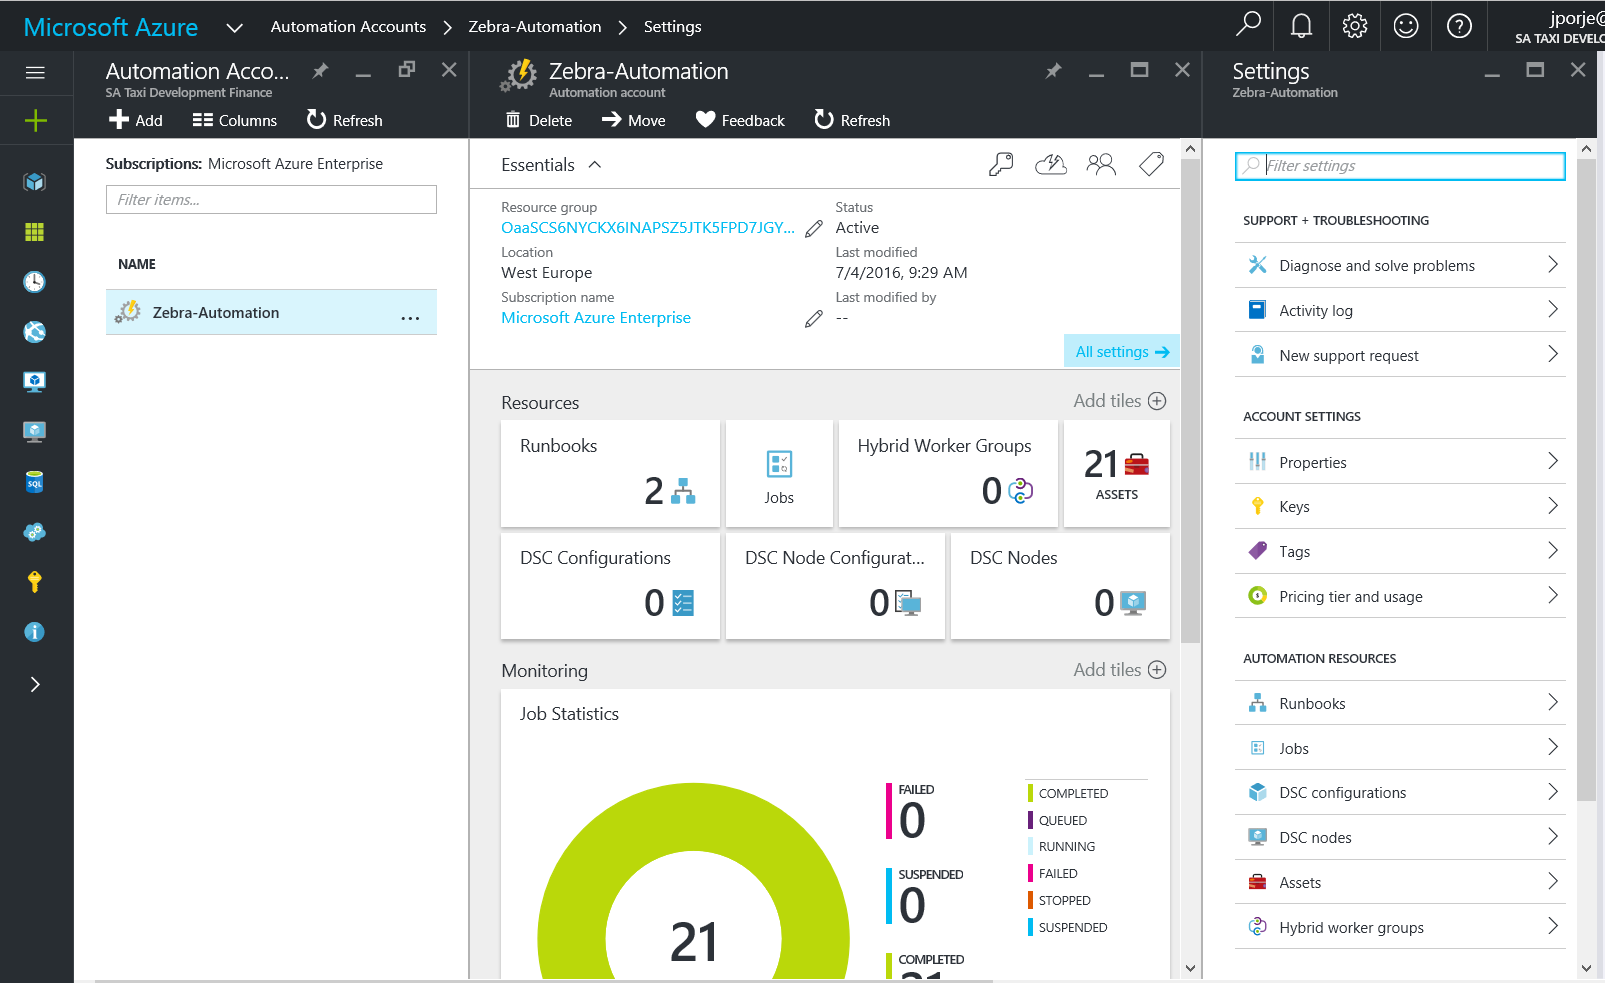
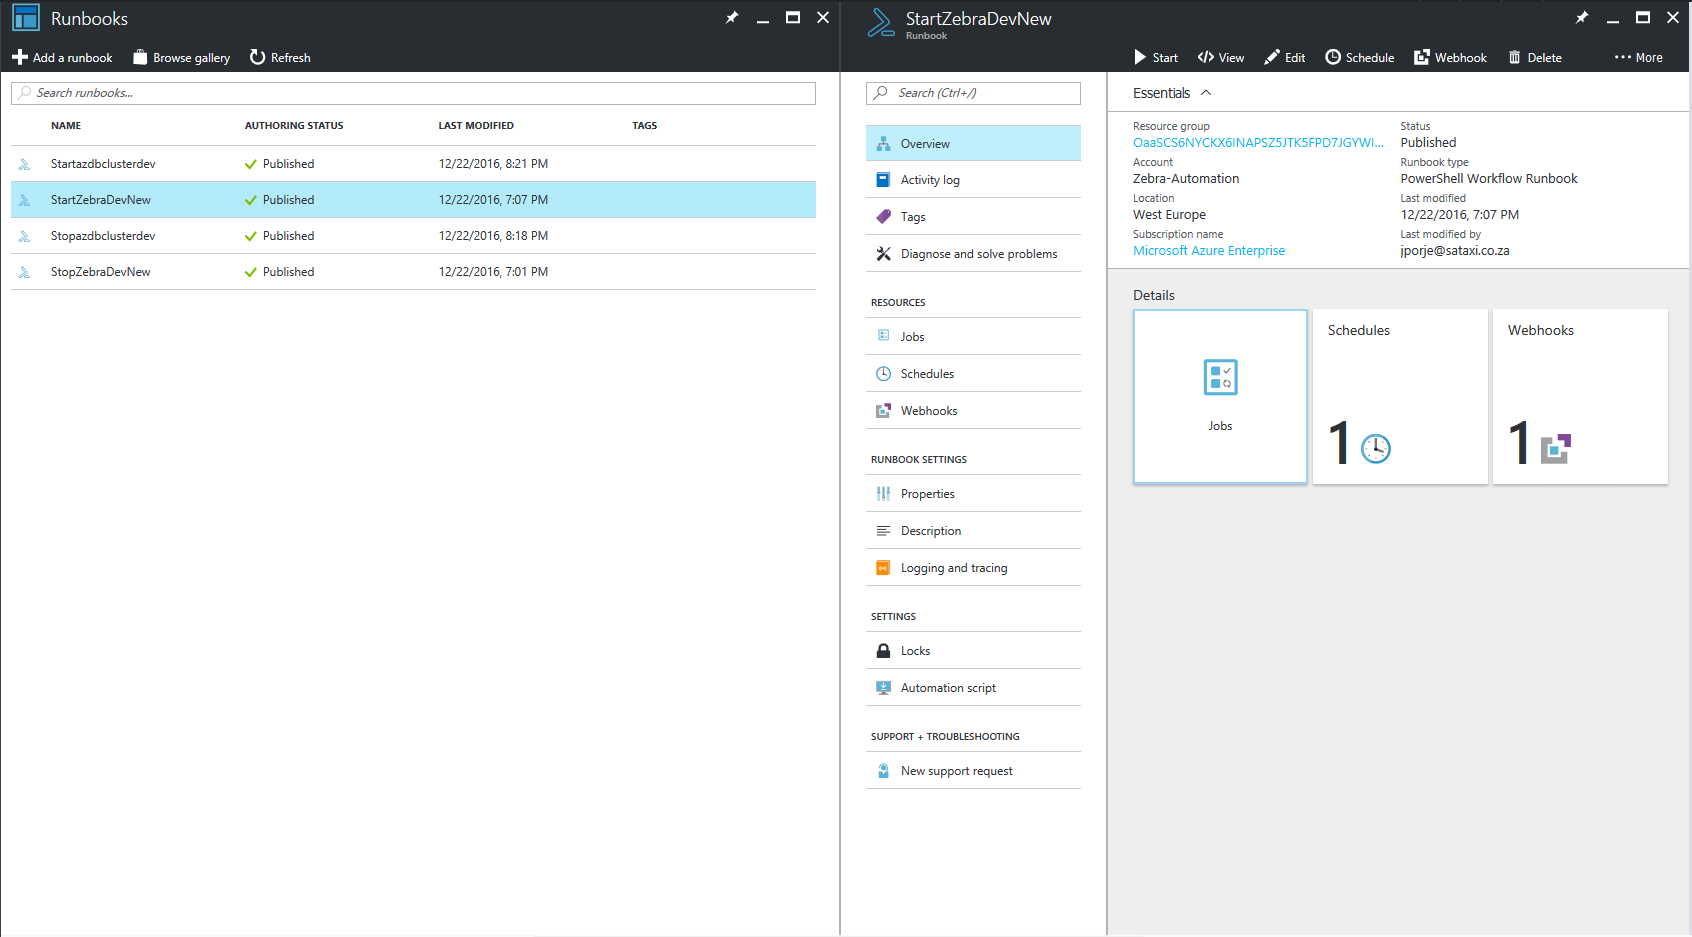
1.3 Automation Dashboard
The automation dashboard is the place where Azure displays the information related to Jobs and its statuses.

1.4 Install Azure PowerShell on the server
For the runbook scripts to execute on the VM, the VM needs to have Windows PowerShell and Azure PowerShell installed.
Azure PowerShell can be installed from Web Platform Installer.
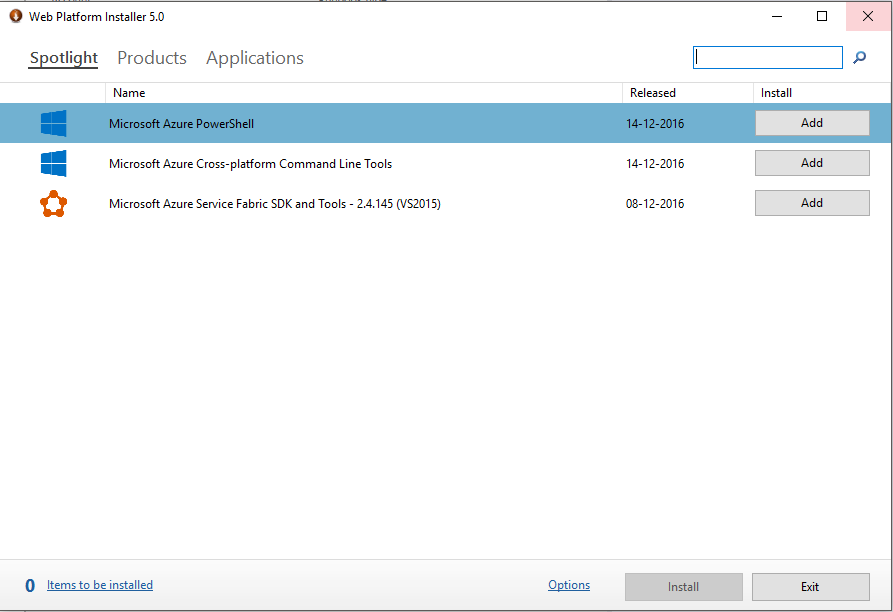
To install Web Platform Installer, please follow this link.
https://www.microsoft.com/web/downloads/platform.aspx?lang=
To verify that Azure PowerShell is installed or not, execute the following command on the Windows PowerShell Command Line Interface
Get-AzureAccount
Get-AzureSubscription
If the PowerShell return the subscription details, that means Azure PowerShell is installed correct.
To troubleshoot the installation of Azure PowerShell, please follow this link.
https://docs.microsoft.com/en-us/powershell/azureps-cmdlets-docs/
1.5 Create a Start VM Runbook Workflow
To create a runbook workflow to start a job
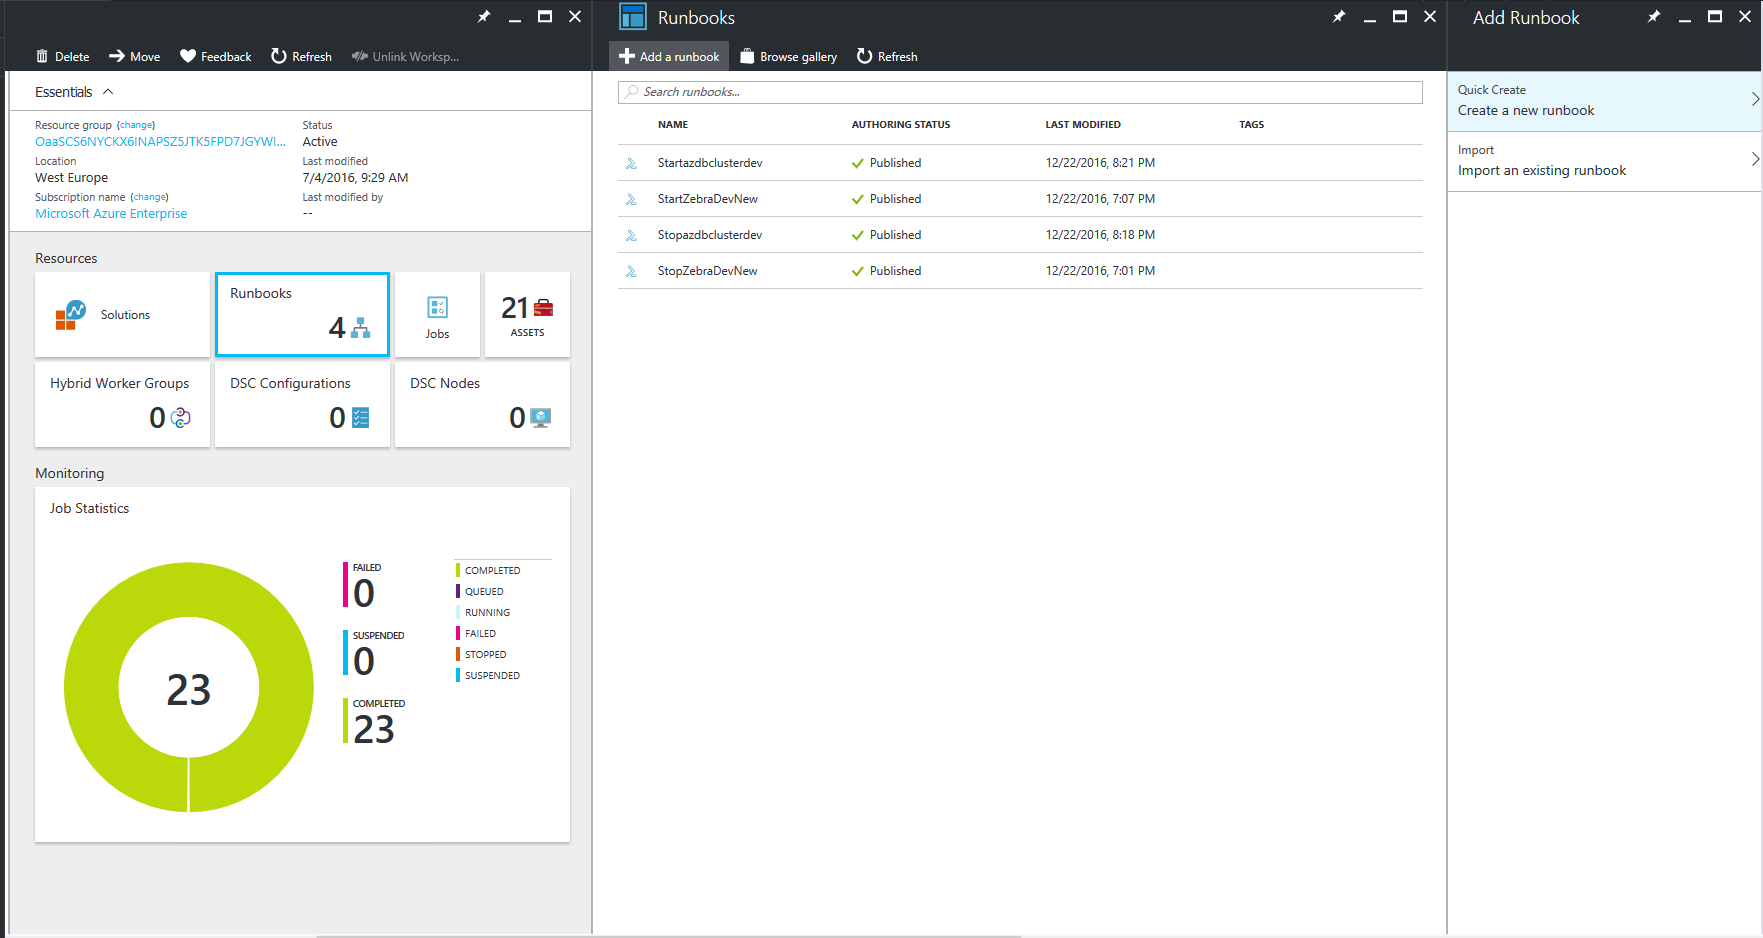
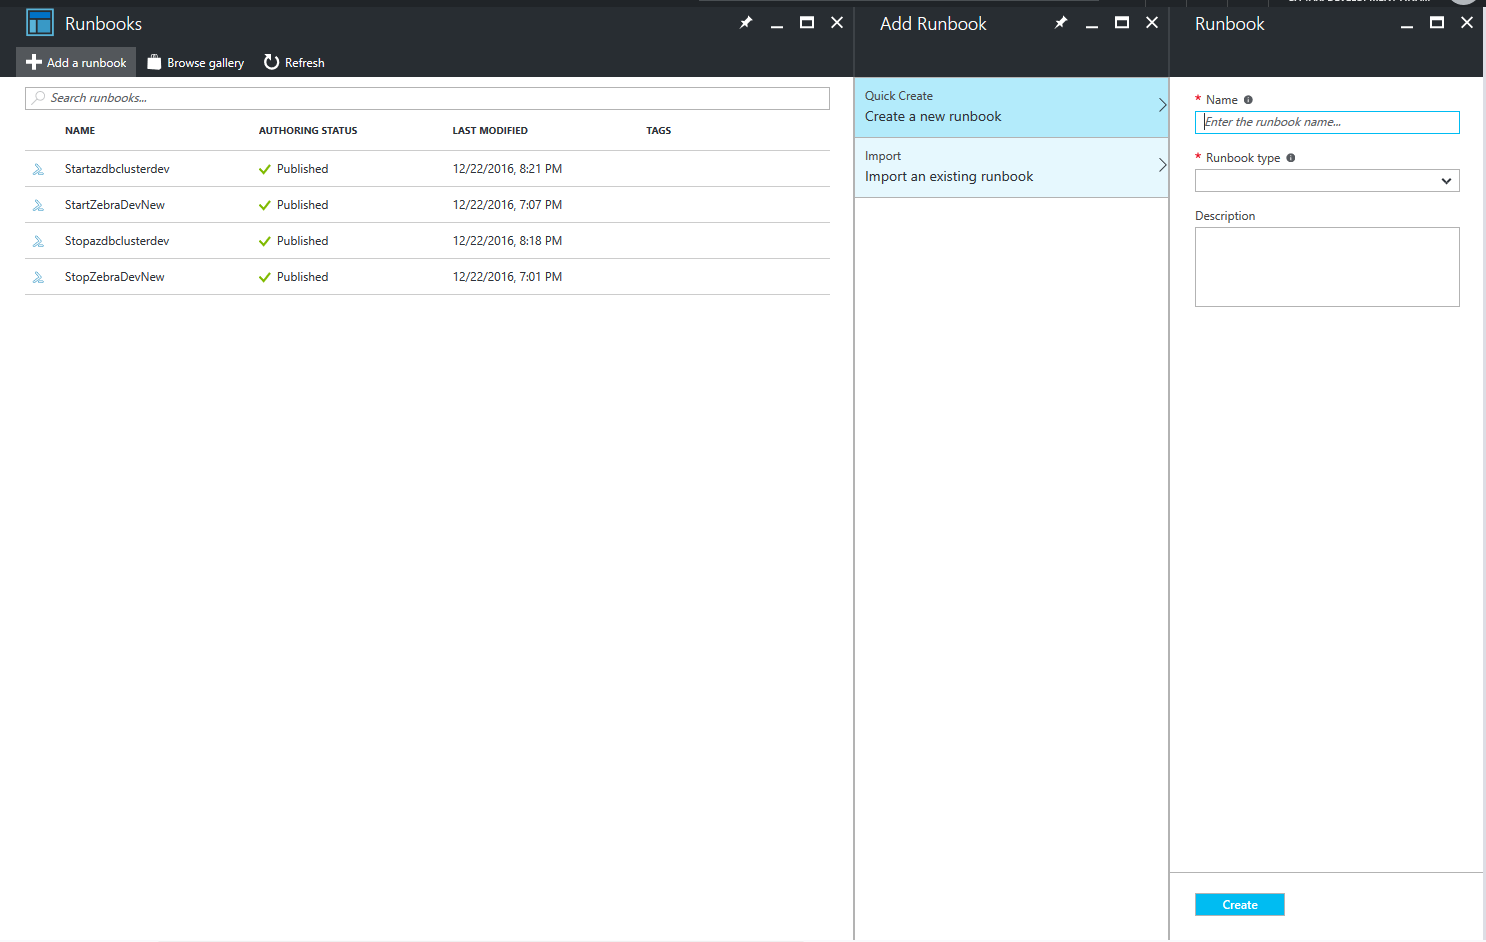
Any script that you write under the Runbook job should be of type “PowerShell Workflow”
1.6 Create/ Edit the Job Script
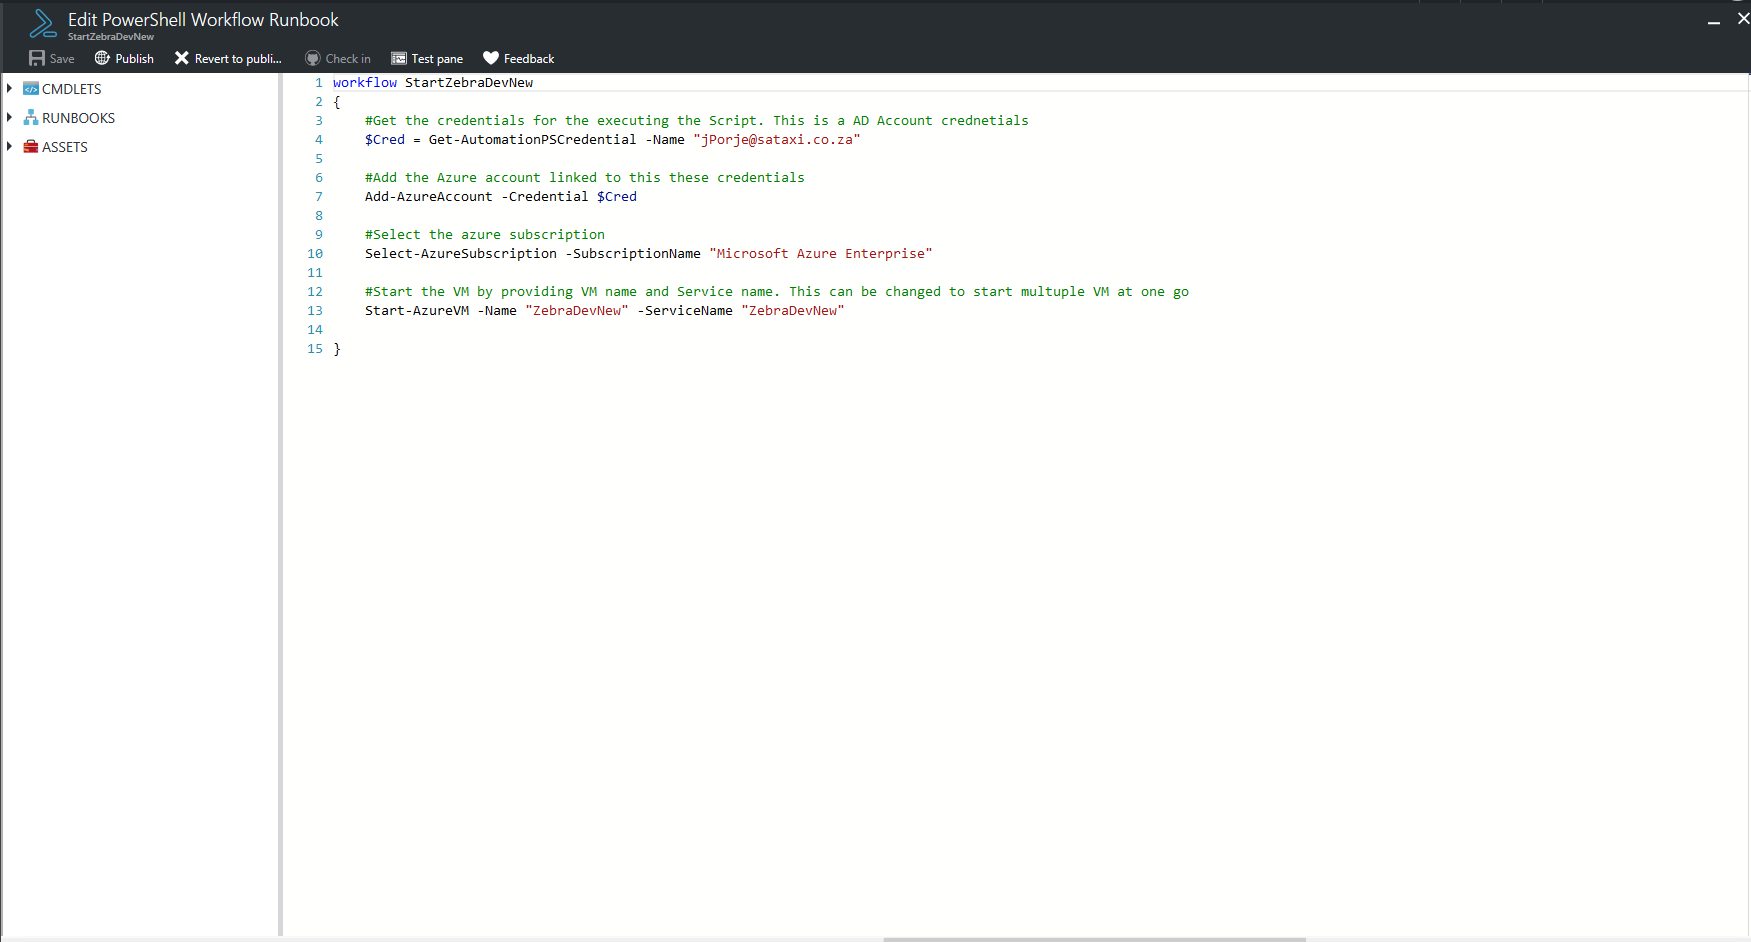
1.6.1 Start VM Script
workflow StartZebraDevNew5
{
#Get the credentials for the executing the Script. This is an AD Account credentials
$Cred = Get-AutomationPSCredential -Name “ jporje at sataxi.co.za ”
#Add the Azure account linked to this these credentials
Add-AzureAccount -Credential $Cred
#Select the azure subscription
Select-AzureSubscription -SubscriptionName “Microsoft Azure Enterprise2”
#Start the VM by providing VM name and Service name. This can be changed to start multiple VM at one go
Start-AzureVM -Name “ZebraDevNew3” -ServiceName “ZebraDevNew4”
}
1 – Name of the account for which the Credentials are configured (Step 2)
2 – Azure Subscription Name under which the VM is located
3 – Name of the VM which is to be started
4 – Name of the Service under which the VM is running
5 – This will be set by Azure based on the name of the Runbooks PowerShell Workflow which is created.
1.6.2 Stop VM Script
workflow StopZebraDevNew5
{
#Get the credentials for the executing the Script. This is an AD Account credentials
$Cred = Get-AutomationPSCredential -Name ” jporje at sataxi.co.za ”
#Add the Azure account linked to this these credentials
Add-AzureAccount -Credential $Cred
#Select the azure subscription
Select-AzureSubscription -SubscriptionName “Microsoft Azure Enterprise2”
#Get-AzureVM | select InstanceName
#Stop the VM by providing VM name and Service name. This can be changed to stop multiple VM at one go
Stop-AzureVM -Name “ZebraDevNew3” -ServiceName “ZebraDevNew4” -Force
}
Note: The -Force is required in the stop VM so that the existing connections to the VM will be closed and the VM will be force shut down.
You can test the runbooks created by using the “Test Script” feature.
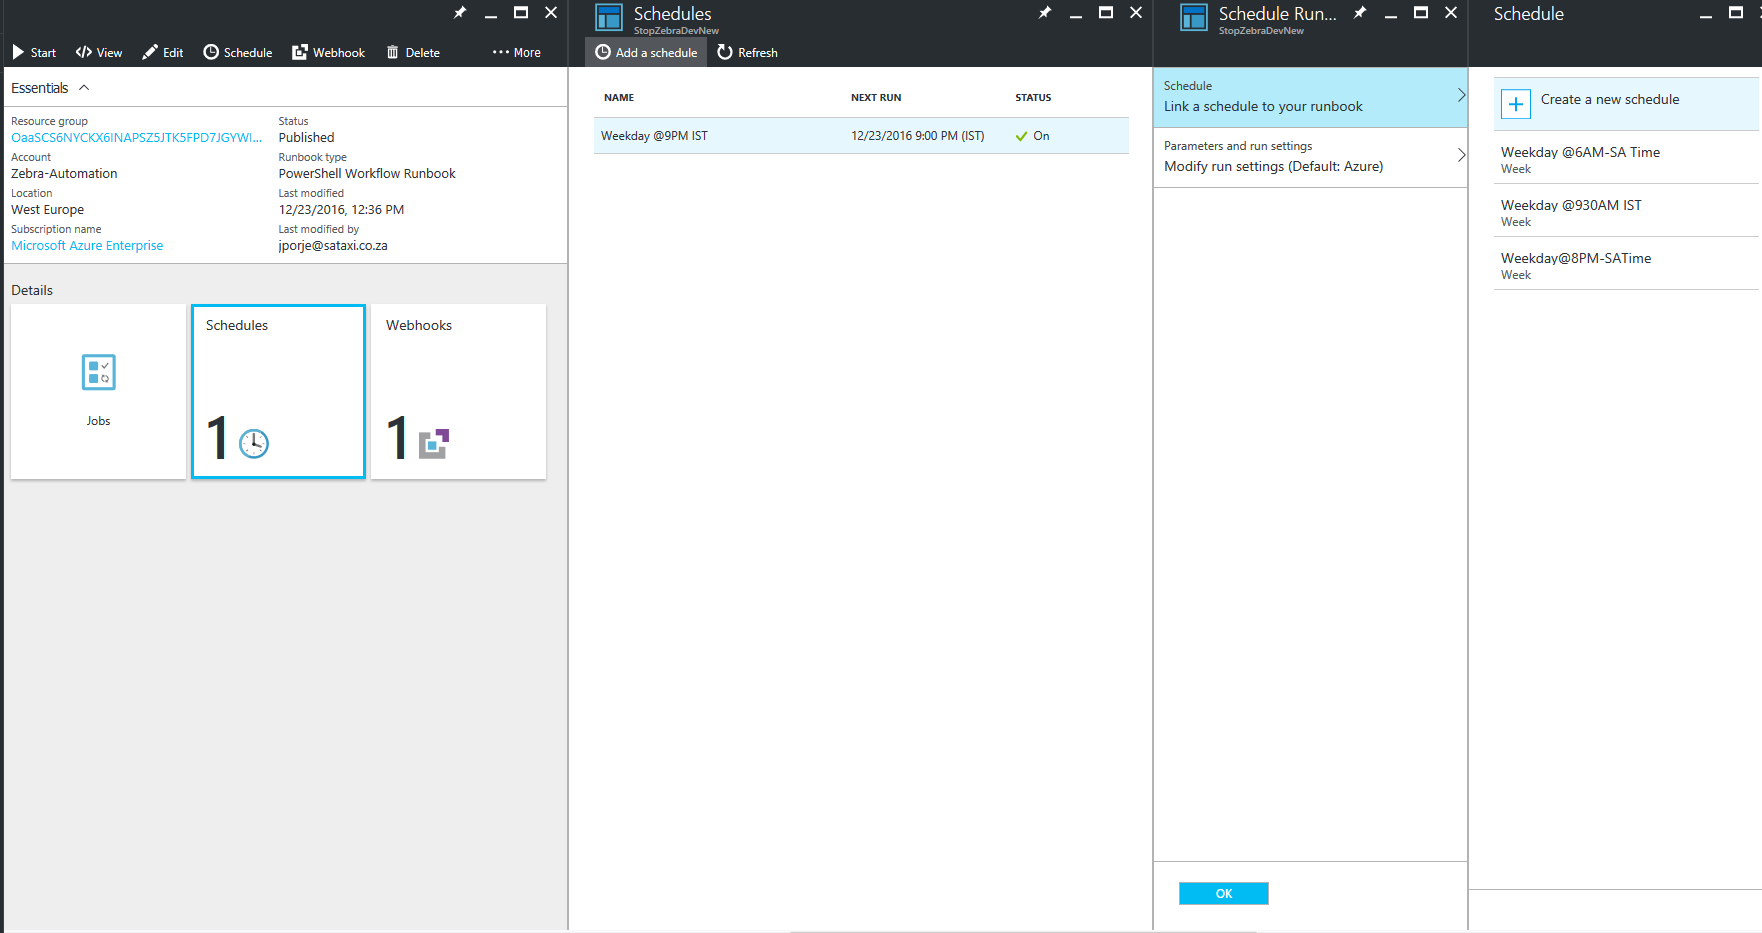
1.7 Associating Schedules to the Jobs
Once the jobs are created, create schedules under the automation account.
Note: Schedules are independent entities on Azure Portal. One schedule can be associated with multiple jobs.
Note: A schedule once created cannot be edited.
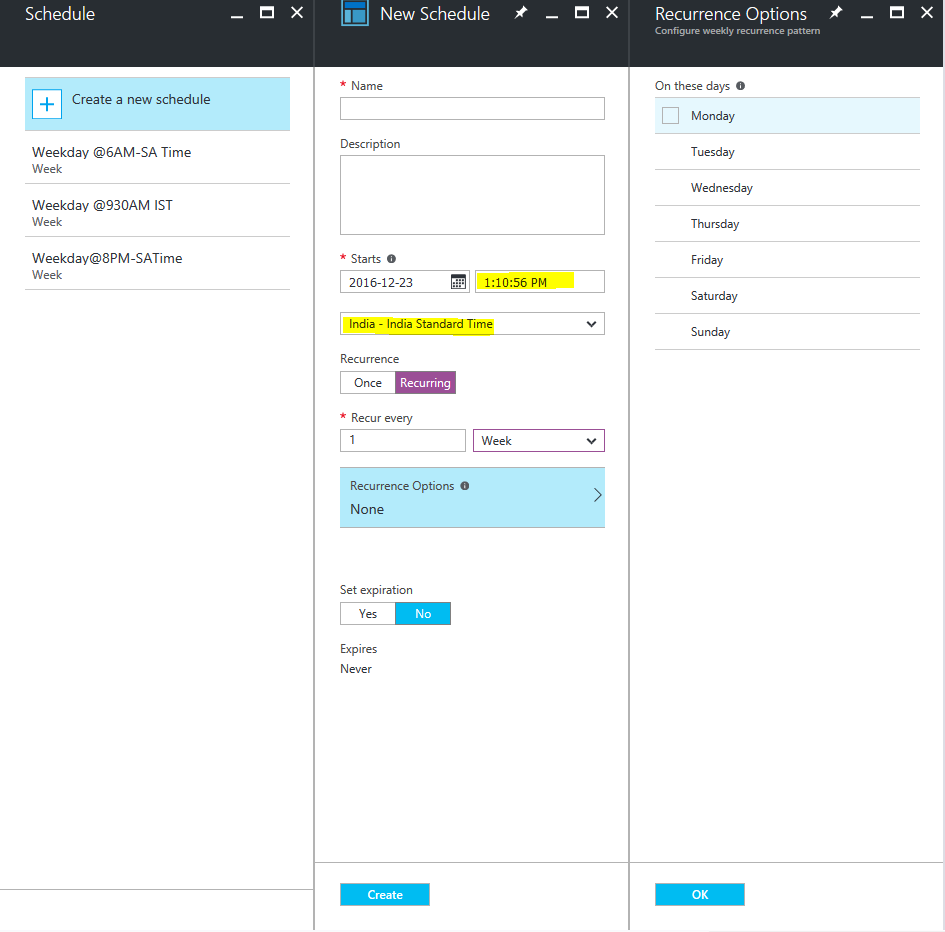
For weekday execution, we need to select the recurring frequency as Week and Recurrence Options to particular days of the week.
Note: The time specified under the schedule should be re-checked along with the time zone.
Note: Give a proper name to the schedule from where you can quickly identify the days, time and time zone when the schedule will be executed.
1.8 Create WebHooks for External Access to the Job
Now that the jobs have set to execute at a particular time based on the schedule, there are cases when the VM needs to be started outside the schedule time.
A VM can be started by logging into the Azure Portal. In case the person which azure portal access is available, we can use WebHooks to execute the jobs.
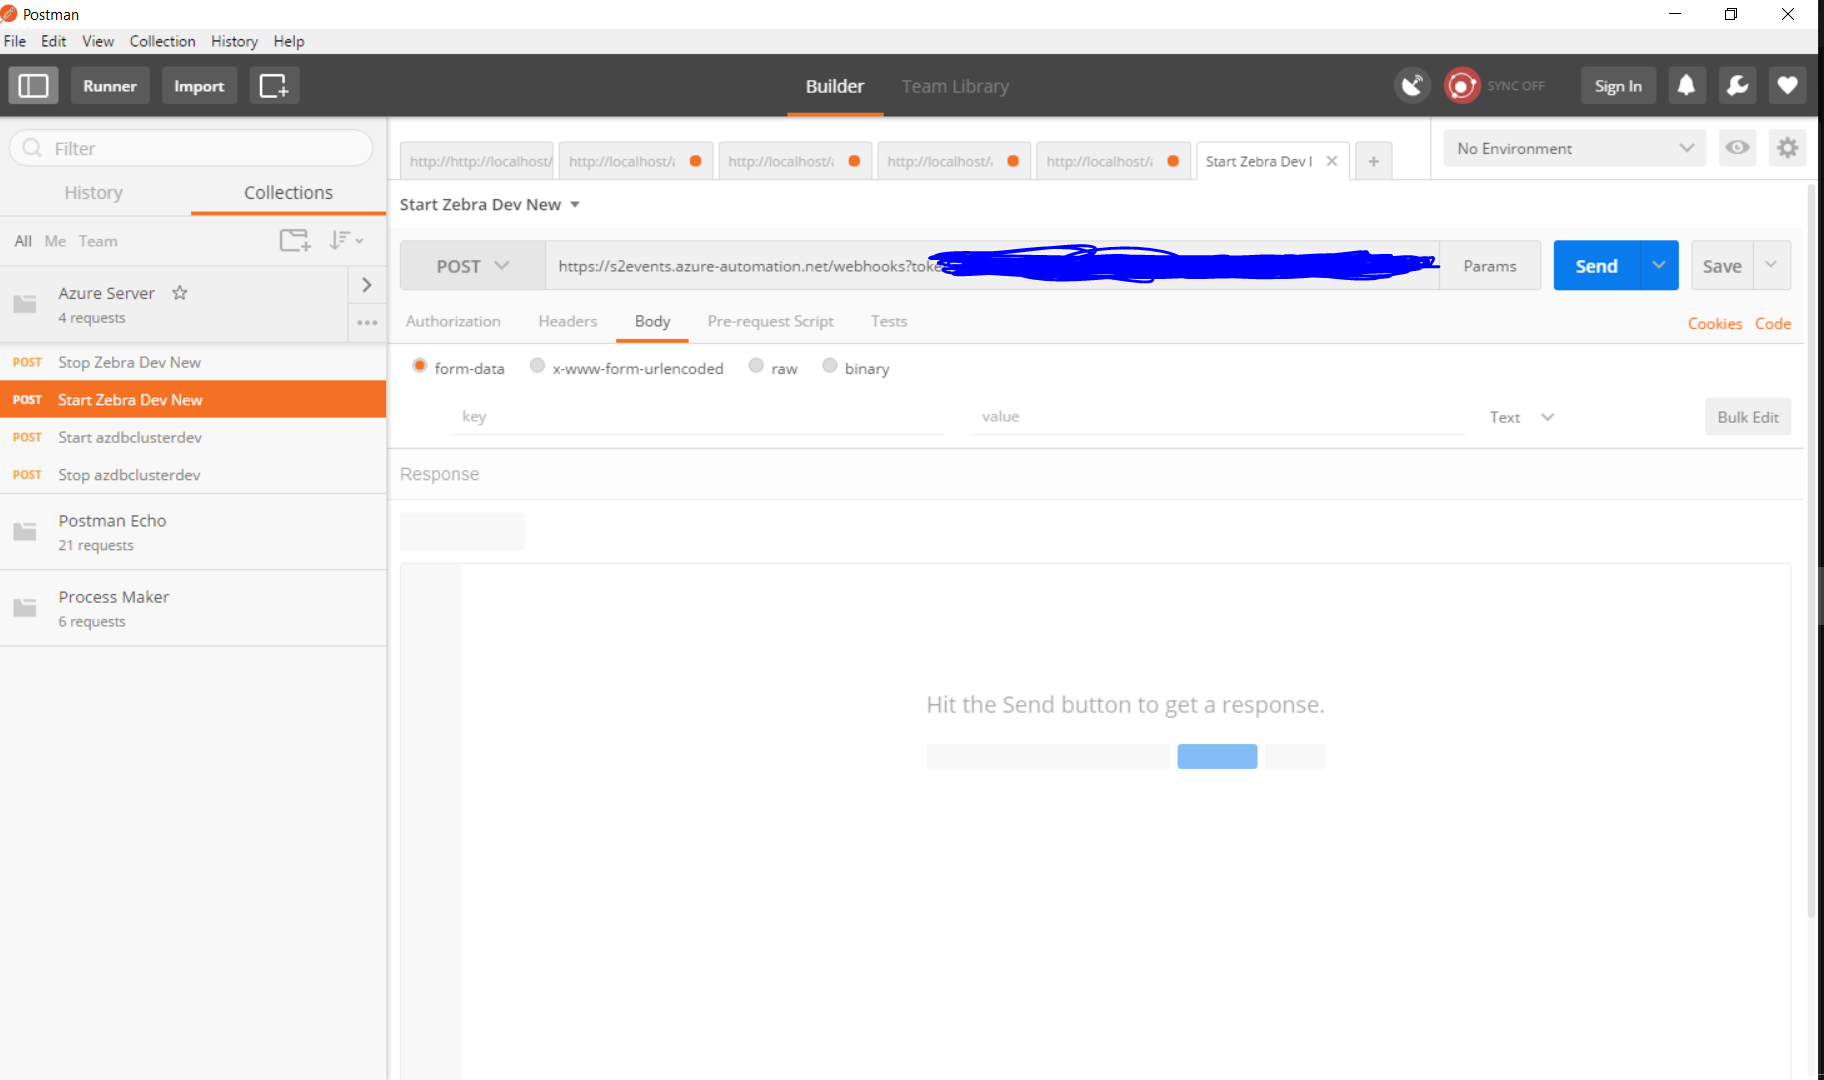
Web Hooks are web URL with tokens which trigger particular jobs. These are POST methods and can be executed from applications like POSTMAN or included in a custom web page.
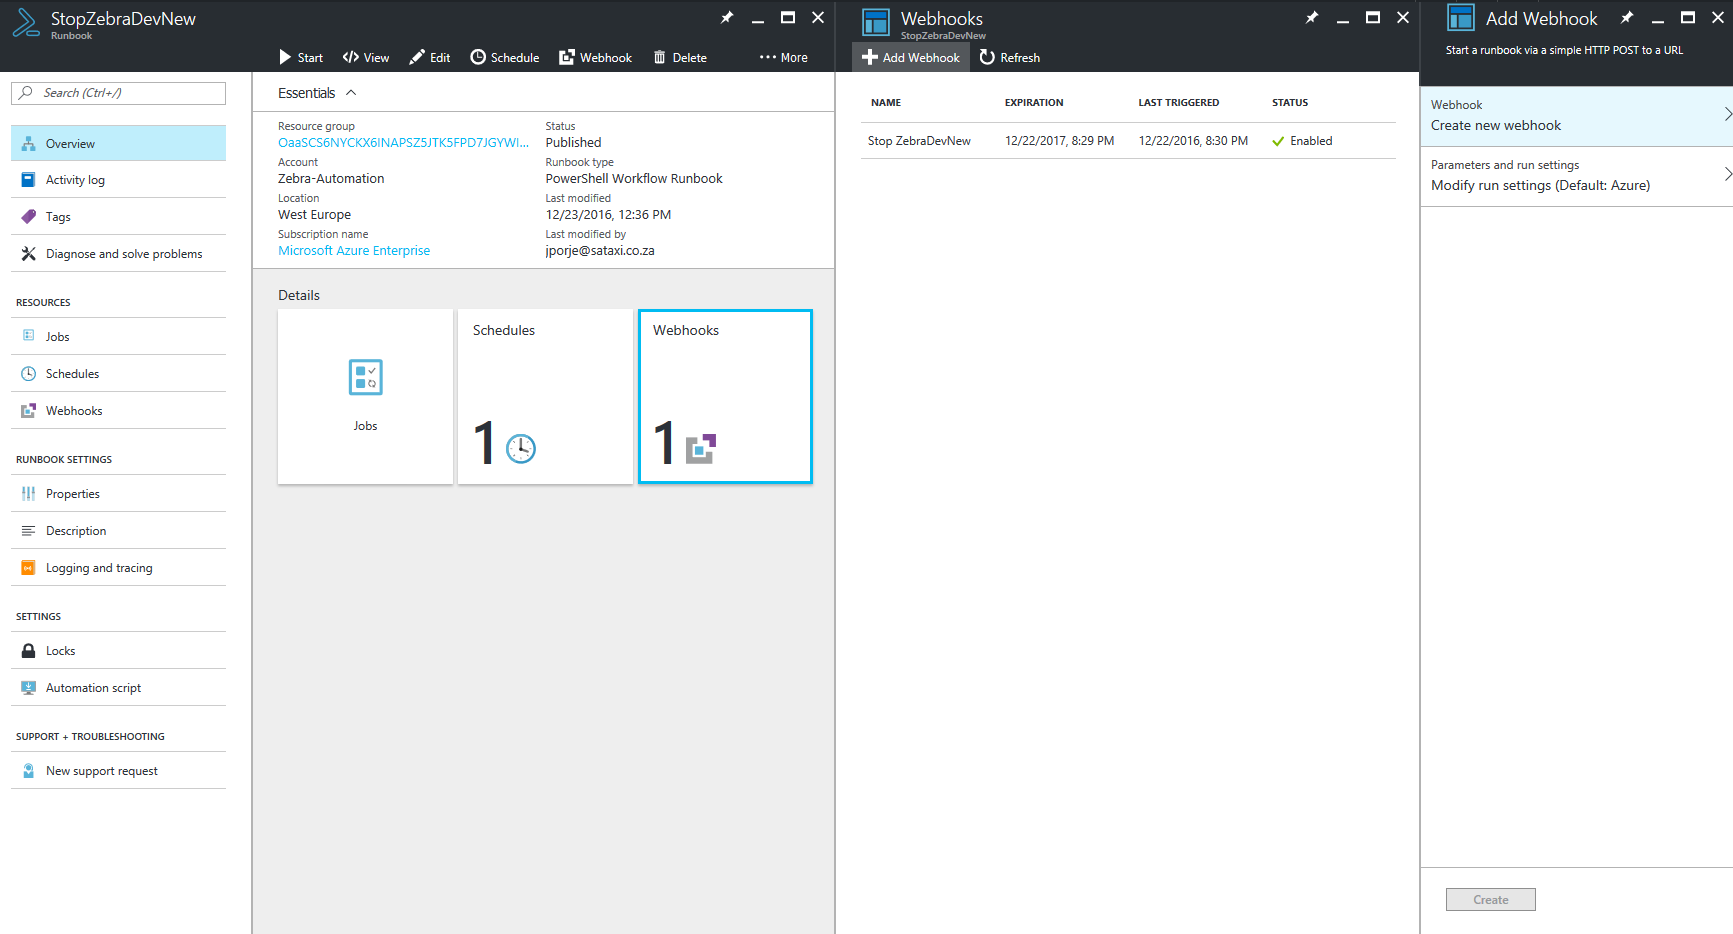
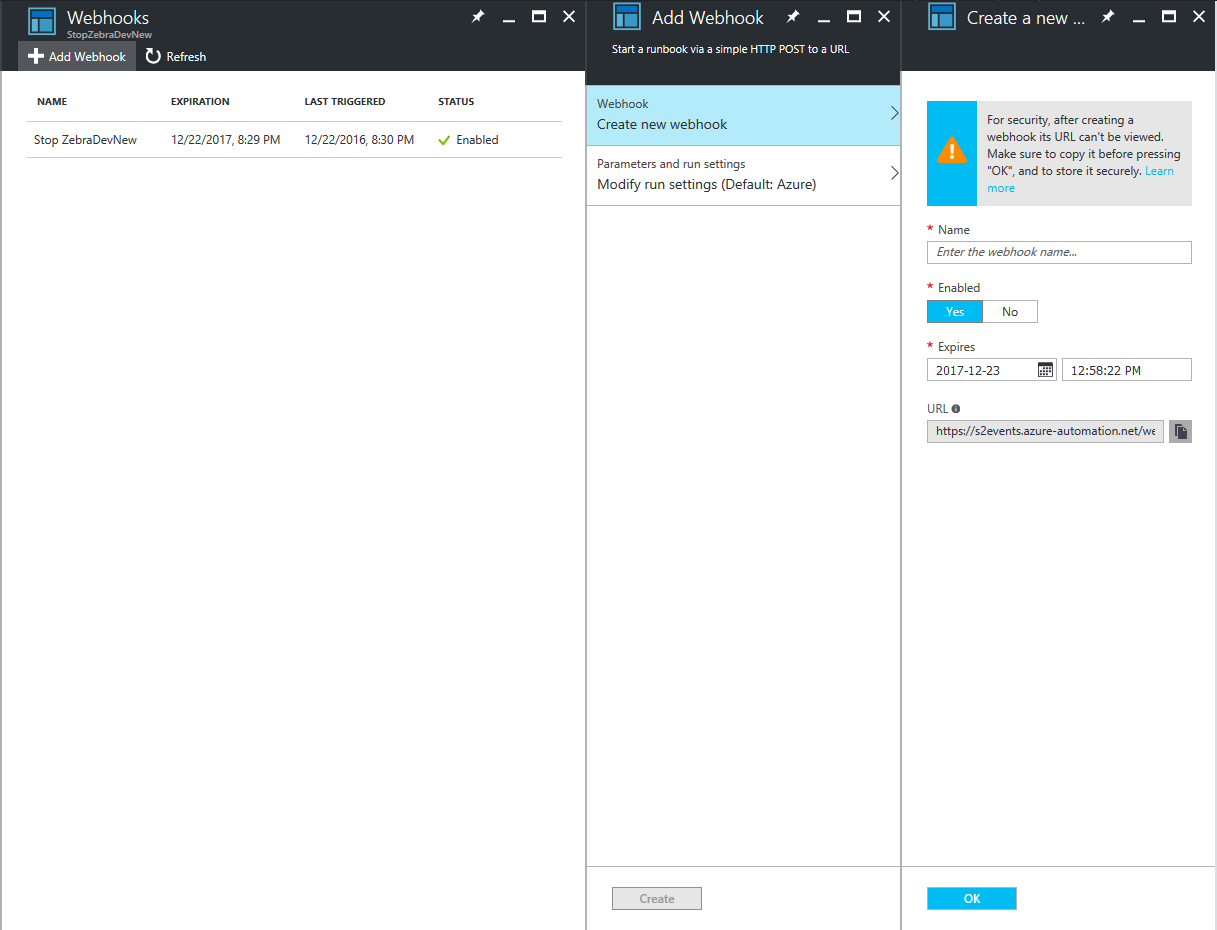
Note: The Web Hooks URL is not displayed after the Web Hook gets created. You need to copy it before clicking the Ok button.
Web hooks needs to be created for both start and stop VM jobs.
1.9 Executing WebHooks from Postman Application
WebHooks are POST API which can be accessed. Below examples shows how to execute the WebHook using Postman.